

Out it comes, only this one piece
| A how to on opening a Sankey type keg. May be useful if you are a home brewer, and want to put your beer in a standard Keg. | ||
| Disclaimer: Opening a keg can be a hazardous operation. The pressure in a barrel can be as high as 60 PSI if not even greater. Removal of the keg stem while pressurized can create a projectile that can cause great bodily harm, or damage to property. | |
|
| Disclaimer: This web page is strictly a documentation of what can be done. In no way do I endorse or sanction any individual that should perform this operation. | ||
| Disclaimer: This page is informational only on how a Sankey type beer keg is assembled. | ||
| OK now lets look at our project | ||
|
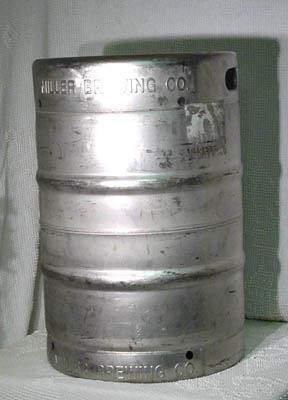
Here we have an empty 1/2 barrel beer keg. This one just happens to be a Miller keg. These are designed to hold 15 gallons of liquid, and a maximum charge pressure of 60PSI. | |
|
And here is the only way in and out of the barrel, the neck. This fitting is known as a "SanKey" in the industry. | When Pabst used wooden Bung to fill barrels, it was easy to make new Beachwood bungs, and gain access to the barrel with a drill |
| The first step, and the most important is to blow off the charge pressure. This can be done while still in the tapper, by turning off the C02 gas, and opening the tap. At all times in this process, it cannot be stressed enough that you must allways check to be sure that a charge has not built up in the barrel. Things such as heat, will cause it to be recharged, or any small residue of beer, that is still active can create pressure. I use a small wooden dowl rod to press down on the ball valve in the center of the fitting. | ||
|
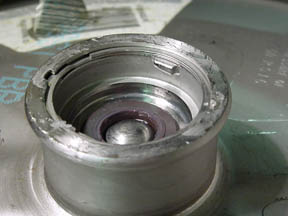
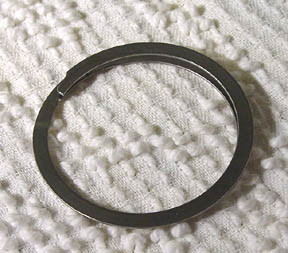
Now if you carefully examine the very top rim of the neck, you will see stainless spring ring holding the stem assembly together. | |
| Note that the leading edge of the ring has a taper to allow for a removal tool to get a start. | |
|
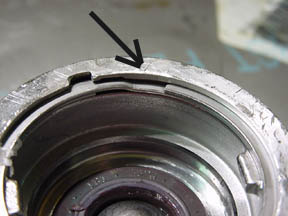
| I will use a metal awl, and a small straight blade screwdriver. The awl first to get in behind the taper edge, pry the leading edge out, and then use the screwdriver to work the ring out of the channel. It is quite easy to do this, once the ring is started out. | HEY !! DID YOU REMEMBER TO BLEED THE PRESSURE BEFORE STARTING AFTER THIS RING WITH A SHARP METAL TOOL ??? | Keep your head clear of this anyway, while performing this operation, and you may only lose a few fingers instead of your face |
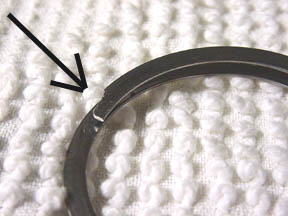
| Well if you made it this far, you now have the ring out of the neck, and here it is. | |
|
|
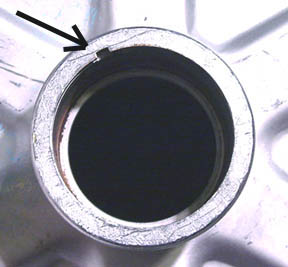
Note that there is a Keyway notch on the neck | |
| And also one on the stem. | |
|
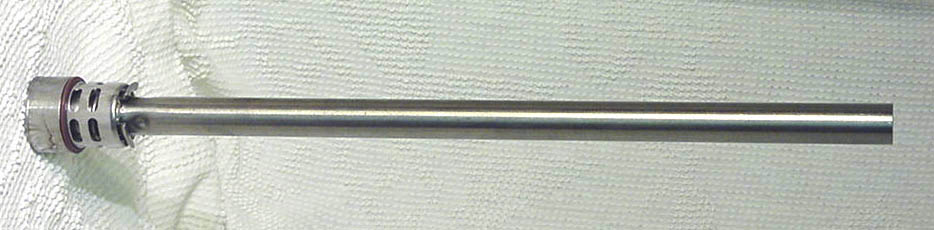
| You need to rotate the stem in the neck until these keys line up, and you will be able to lift out the stem | ||
|
||
|
Out it comes, only this one piece |
||
|
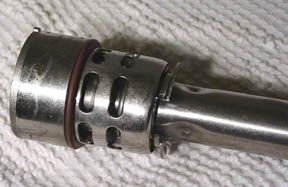
A close up view of the stem head valve assembly. There is an "O-ring", if you need to replace this it must be a food grade "O-ring" | |
| Well now you have it Clean your barrel with hot soapy water, rinse well in a bleach sanitizing solution. Do the same for the stem, and steel ring. and your ready to go ! | ||
| This is not an endorsement of anybody's product, but a do-it-yourself kit that replaces the Stainless steel ring with a standard "snap ring" can be found HERE | Back to main |