Build a Model Chris-Craft Barrel Back Boat
Last update February 17, 2004
Well You should have guessed it by now, but I don't have enough hobbies. This is yet another undertaking to build a model boat. This one is from Dumas, Its the "Barrel Back". I bought it from a vendor on Ebay,and got a really good deal. I questioned the amount of time to construct, and was told that it ranged from 50 to 100 hours. Well lets see just how close that is for me, I will keep a modest accounting of the time that I have invested in this project. You can find this kit by Clicking on the finished boat above in the above picture.
Visitors
|
March 10, 2003 Received the kit, and opened it up to sort the parts. It is basically a box of cutup wood. CRAP!, This already looks like a bigger job than I had expected. Well there is no going back now Forward, March ! |
 |
|
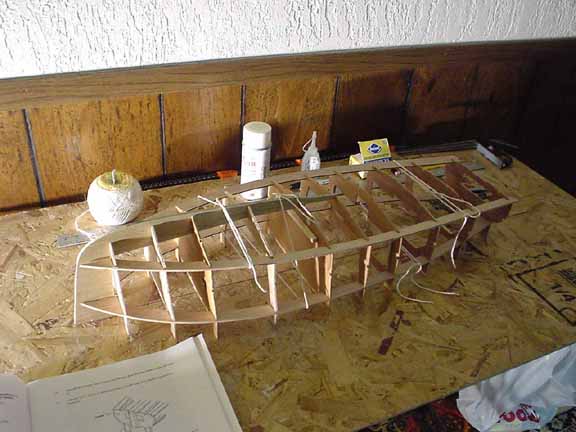
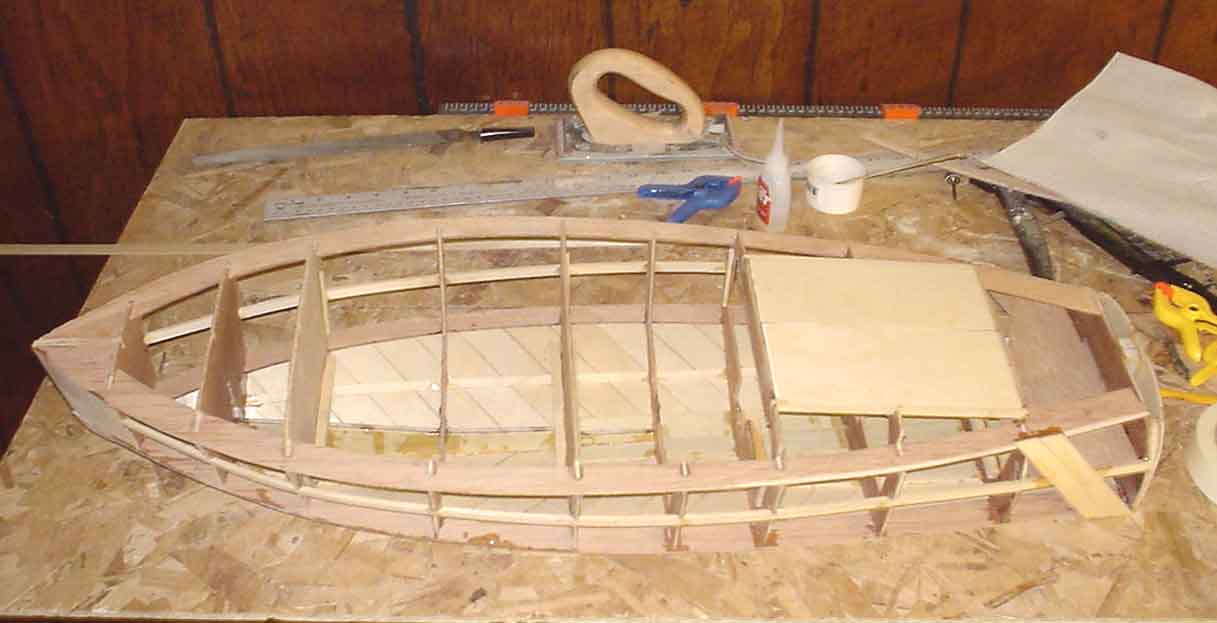
March 15 2003 Well I have made some room in the basement on the work-mate and got the basic frame setup and ready to glue I highly recommend that you read far in advance in the plans to see ahead a little bit, do this every time before you start to do anything, to refresh the game plan in your head a little bit to so you can understand exactly what they are trying to do. The plans wanted me to cement certain parts to the board to align them, but I found it better to tie the whole works together with string first to get proper frame alignment, and then cement it to the building board.. Time to date 4 hr. |
 |
|
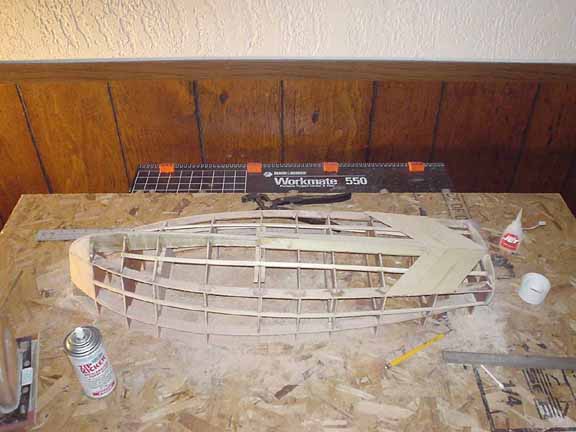
March 26 2003 The frame has been glued in place to the board, and I am now starting the first layer of planking. You can only go for around 1 hr at a time up to this point, as most parts are assembled with epoxy, and it must cure for 24hr period to achieve full strength Time to date 12 Hr. |
 |
|
March 30 2003 I had some time this weekend to plank the hull, what a job ! It started out easy from the back, but became increasingly more difficult as I approached the bow. For some reason, the planks would get out of alignment, and one would need to be ripped thinner to even things up. The instructions said to use a 45 degree angle, but this did not work as I got near the front. I had to insert a triangle shape piece to lessen the angle, so the boards would properly conform to the hull shape. This consumed a bottle of thick CyA
Time to Date 15 Hr. |
 |
|
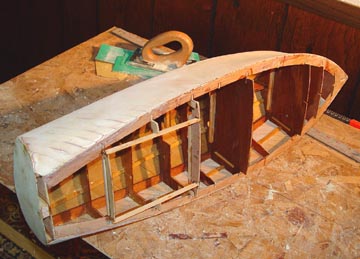
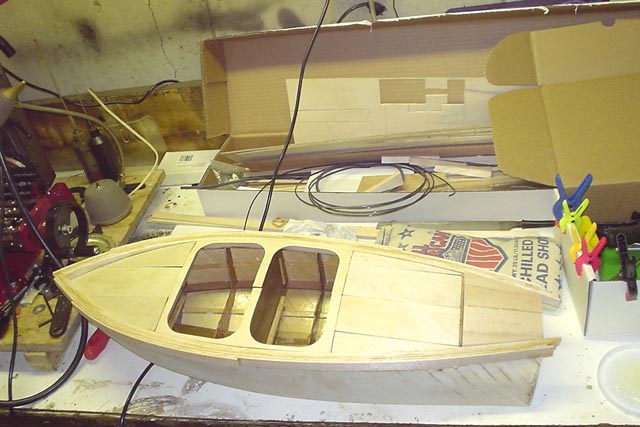
May 4 2003 I have been working on this boat off and on, but have had several interruptions, like TAXES, and broken down vehicles. Most of the work, has been small detail stuff, like motor mounts, sanding the hull smooth, and constructing the hatch. You can only go so far, until you run out of clamps, or have to wait for epoxy to fully cure. I have now started planking the gunwales. This is starting out hard, and slow. The planks have to be bent around the curvature of the boat back at the stern. Note that I have temporally inserted a brace to support the stringer at the rear of the boat. The pressure of the planks wants to distort the stringer. Time to date 18 Hr. |
 |
 |
 |
|
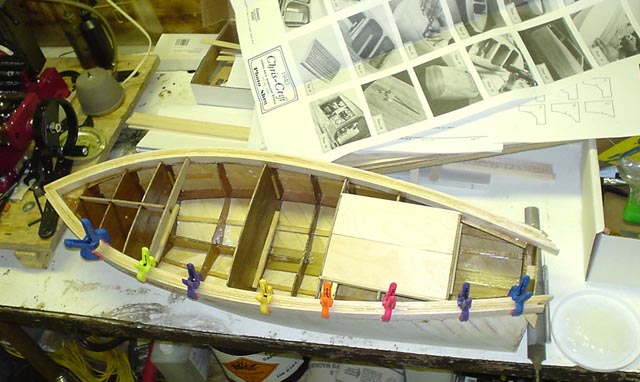
May 18 2003 The Gunwales have now been planked. It got a little easier as I moved to toward the bow of the boat I have found it best to lay the plank in place, mark its edged on the frame with a pencil, and apply the super glue to the area with a toothpick. I then spray the underside of the plank with some Zip Kicker accelerator, set the plank at the chine, hold it till it hardens in place, and then wrap the plank up around to the deck, hold it in place, and spray the accelerator to set it in place. A note, you should keep the X-Acto knife nearby at all times, so you can cut yourself free, on the occasions where the glue gets to the outside of the plank, and you should happen to get stuck. |
Next step is to basically "bondo" the planks with micro balloons, and sand the entire hull to the correct shape, nice and smooth so the mahogany planks can be neatly laid in place. I plan on putting this boat in the water, so I will also coat the entire inside area with a 2 part resin sealer. Time to date 21 hrs. |
|
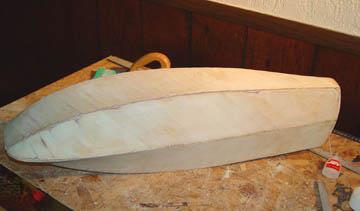
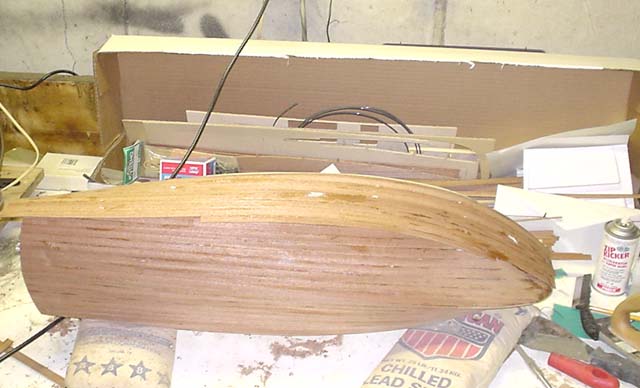
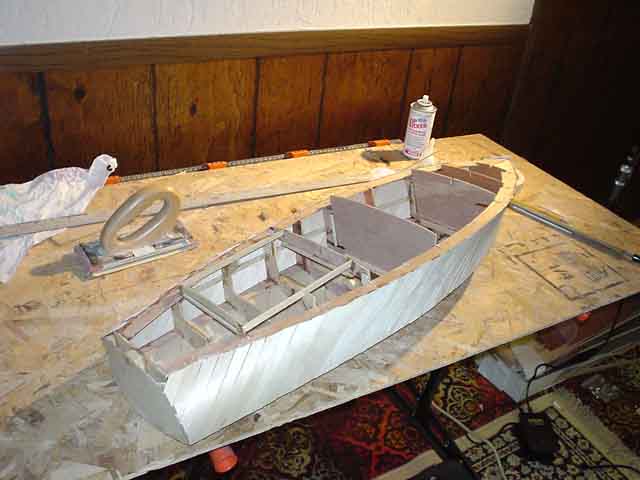
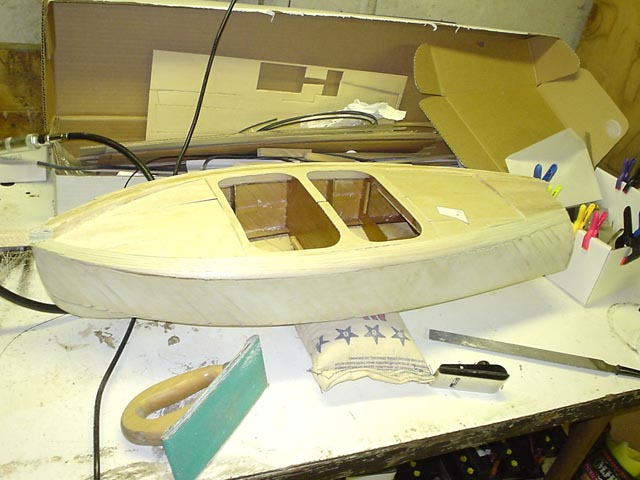
August 2 2003 I have finished filling in the outer hull with microballons, and epoxy. The plans suggest that you can use "Bondo", but if you have had any experience with Bondo, you would know that it will attract, and hold water. At least the stuff available 10 years ago or so would. This is not what I would use on a watercraft, so I decided to use the microballons. Neat stuff, it was like trying to mix in flour with the epoxy, and never gained the thicker "stay put" qualities of bondo. I coated the entire hull with the first coat, and then sanded, and repeated the process again for the second coat. This enabled me to get the hull very uniform, and smooth, hopefully making the step of attaching the mahogany planking a little easier. All of the sanding was done by hand with the small ridged hand sander you can see in the photo. I considered getting one of the small vibrating hobby sanders, and still may, but to get things really straight, with no lumps, you have to use a ridged board. This is one of the mistakes that all amateurs make in auto body repair, using a "D-A" or dual action sander to feather out the filler. It always will leave the lumpy finish that is highly visible once the car is painted |
I also used a finishing epoxy to seal the entire inner hull. This was a recommended step if you are going to put the boat in the water, but I would recommend doing it in either case, as it really cements the entire structure together making it extremely rigid. By the way I now have used about $50 in adhesives accelerators, and fillers. Next step is to work on the top rail of the gunwales Time to date around 25 hours. |
|
Jan 4 2004 It has been quite some time since I have had any time to look at this project. Finally ! I have had to relocate my project back into my workshop. This has put the squeeze on space. The next phase is to construct the top rail around the hull. It is made from layers of 1/8" x 5/8" balsa strips. For the first inner strips, I have used thick CyA to adhere then to the hull, and then lined the backside seam with epoxy. Subsequent layers are tacked at the bow with CyA, wrapped around, and the laminated to the others with epoxy. This does not take much time to do, but it does consume time waiting for each layer to harden. My goal is to finish this boat by spring, so I can take it out and try it in the water. I intend to spend at least 1/2 hour each evening on it to do this. time to date around 27 hours |
 |
|
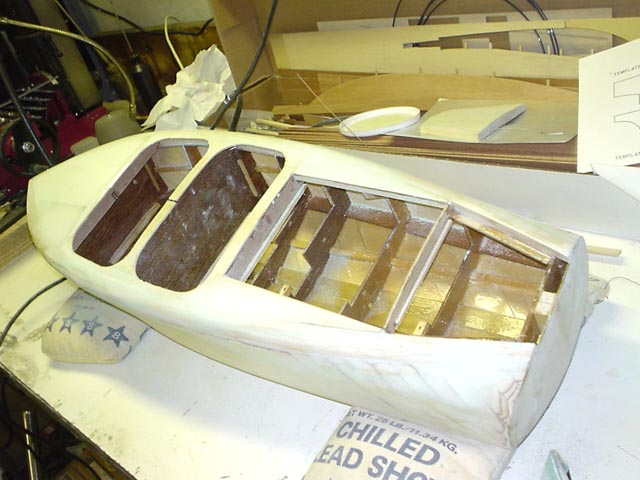
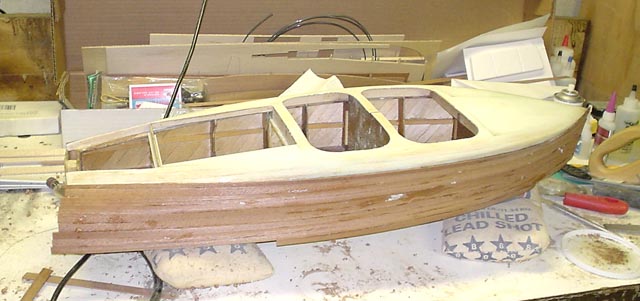
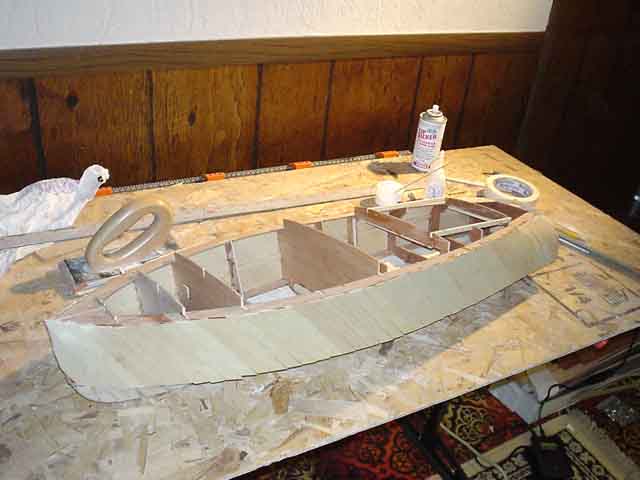
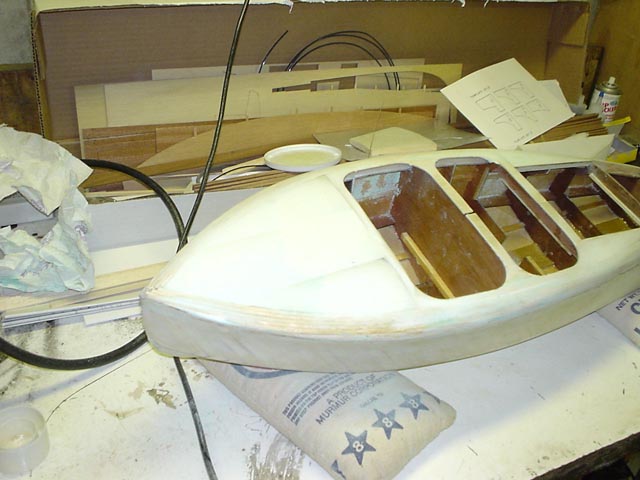
Jan 6 2004 It's amazing what a little attention can do, The deck now has the underlayment plywood cemented on, and the rail is ready to be rough shaped. The bag of shot is used to hold down and conform the plywood parts to the ribs and stringers. In some cases I used straight pins, and clamps wherever possible, some areas of the deck are compound curves, and the shot worked better time to date 28 hours |
 |
|
January 11 2004 OK here is half of the upper rail shaped. They give you small cardboard templates that correspond to the inner rib number to help shape the profile. You can see a small template laying on the boat. The method I used was to use the rasp to fit template number 5 (the center) and then use the small hobby plane to follow the top deck plywood, and the planking on the hull out from the center towards the back of the boat and the front. A lot of stock has to be hogged off at the bow, and a cable driven drill with a sanding drum helped with that. Once close, the sander was used to refine the profile. There is a lot of muscling the boat around during this phase, and the bag of shot helps to steady the boat while you are tooling the wood. The large balsa cover at the back of the boat must also be planed down to match the profile. The key here is to follow the top deck plywood, and the gunwale for the final shape, and just use the cardboard template as a guide. It will be a natural tendency once you begin to get the profile close. Next step is to do the other side, and then mix up a batch of micro balloons to fill in and gaps or imperfections, and sand it out. I think the more attention given to a smooth underlayment at this stage can only help when it is time to put the mahogany down. Time to date 29 hours |
 |
|
Jan 15 2004 The top railing has been sanded down, and the top decking has been filled in with epoxy microballoon mix. I have found the micro balloons like to flow, no matter how thick the mix, so there has been a lot of mix it up, put it down, and wait for it to harden. The shot bags are filled with kitty litter, so they are nice and light, and can be easily formed to any shape to hold the boat steady when sanding or applying the filler. After each coat of filler, the area was sanded when hard, and another coat put on. This boat is rock solid now. I have started on the bottom, and am taking my time to fit each plank. Again this is a real sticky situation, as it is all super glue work. Lost the finger prints again ! time to date 31 hours. |
 |
|
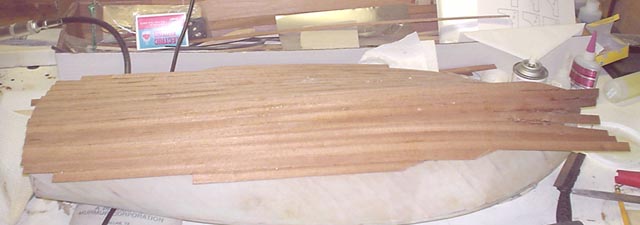
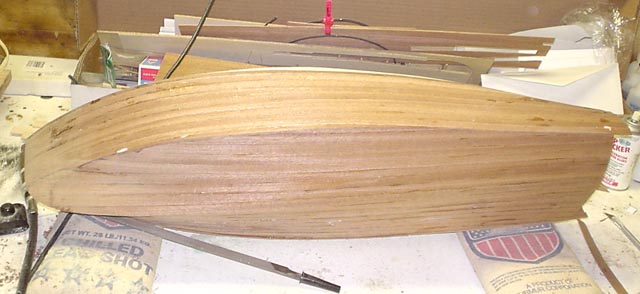
Jan 26 2004 I have all of the planks attached to the hull now, This used another bottle of thick CyA, and there is a lot of my hide stuck to it too ! Yeowzers !! Next step is to very carefully trim the planks even to the gunwale, so the plank along the side can nicely meet up with the planks of the hull. I will use a hobby knife to get close, and then switch to the plane.
Time to date around 33 hours |
As you get near the bow of the boat, the planks have to take a real bend. The instructions recommend not to force them, rather to let them come off at a natural angel, and then fill in the triangular shaped areas with scrap cutoffs. They are not very visible, and will go unnoticed once the hull has had a fiberglass coat. |
|
February 2 2004
I now have the hull trimmed back, and have started planking the side. This is the worst job yet ! you have to really put the pressure on the planks to butt them up to the last laid plank to minimize any gap. Of course the super glue squirts out, and your stuck. I can only take this a 1/2 hour at a time, before my fingers are obliterated.. This was another case where the plans recommended that you glue a plank along the water line, and a plank along the top rail, and fit the others inbetween. I'm glad I didn't do that, it would have been a real pistol to shape the last plank. They don't go in perfectly straight lines, and it would have been a compound curvature to get this in, almost impossible. Time to date 35 hours |
When the super glue squirts out, and leaves a fillet at the edge of the plank just glued in place, a new sharp mill bastard file is used to cut back the glue,and square up the edge of the plank Well one more side to go, and I will have used another large bottle of thick CyA to do the mahogany $10/ bottle, the cost of the chemicals for this project will be near that of the kit when done ! The boat is really becoming very rigid, at this point, once the outer shell has been fiberglassed, this will be a real tuffy |
|
Feb 11 th 2004 I had to leave this project sit for a week, most importantly to let my fingers heal. It was hard to get back on this I was really dreading it, as the Last episode was very painful, and I was not looking forward to planking this last side. I found out of shear necessity that a few pieces of plastic wrap can be laid down on the plank once the CyA is set, and you can squeeze the plank in place while it hardens, somewhat protecting your fingers from being totally glued in place. The down side is that with the plastic, you cannot spray in the accelerator, and Super glue needs moisture from the air to harden, so the process is way slowed down, but worth it , I can still type this week after the plank job ! This was the worst part of this boat so far !!! Next step in the plans is to work on the rudder, and mounting block. I will skip over this step for now, and move on to the planking of the deck. Again the plans recommend that you cement in the plastic strips that simulate the caulking, and lay the outer deck parts in around them, carefully fitting in every piece without dislodging the strip. DONT DO THIS !!! Take the die cut hull strips, and start to puzzle fit them into their places (without gluing them) first. You will most likely find with the addition of the mahogany planking, that there is some additional re shaping of the balsa rails, and the mahogany strips must be knife edged and carefully fit in place. Once these pieces fit nicely. I will glue down the outer set first, and then fit the plastic caulking in place, and then fit the inner strip, and continue on that way. I sometimes wonder how they come up with these instructions? Am I at the half way point yet? Time to this point around 40 hours. |
 |
| PAGE 2 | |
| Back to USA |
 Well I really
can honestly say I HATE super glue
Well I really
can honestly say I HATE super glue