Build A model Chris Craft Barrel Back
Page 2
Last update August 27, 2004
Visitors
| Back to page 1 | Resource link : a Review of this KIT from RC Boat modeler |
| Well I extended this project to a second page to keep the loads in the realm of sanity for Dial up connections | |
| I thought a quick view of some of the tools that I have used in this project may be in order. This is a Small Hobby Table saw, with a 4" carbide tipped blade, It has a small square that fits in the guide, and I use a machinist protractor to set the angels.. It does not have a rip fence, but I have used a small ruler with "C" clamps to make one when needed. This was very useful when cutting the birch planks for the first round of the hull planking job. | 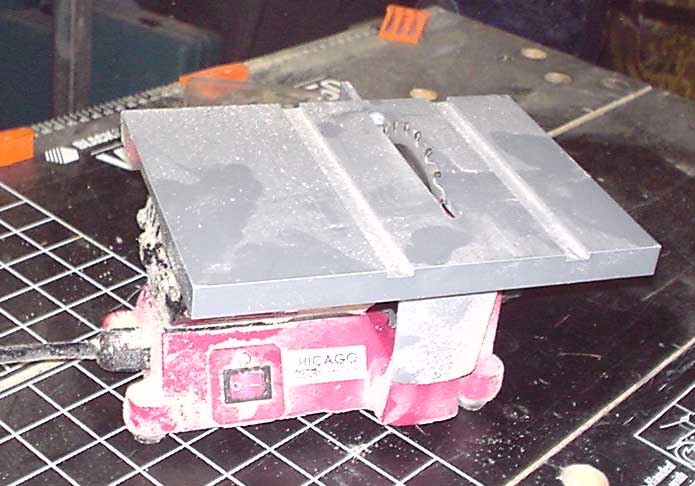 |
| This is a small 2" Chop saw I use this along with a Dial caliper, and scale rule to make any dimensional cuts of smaller timbers. | 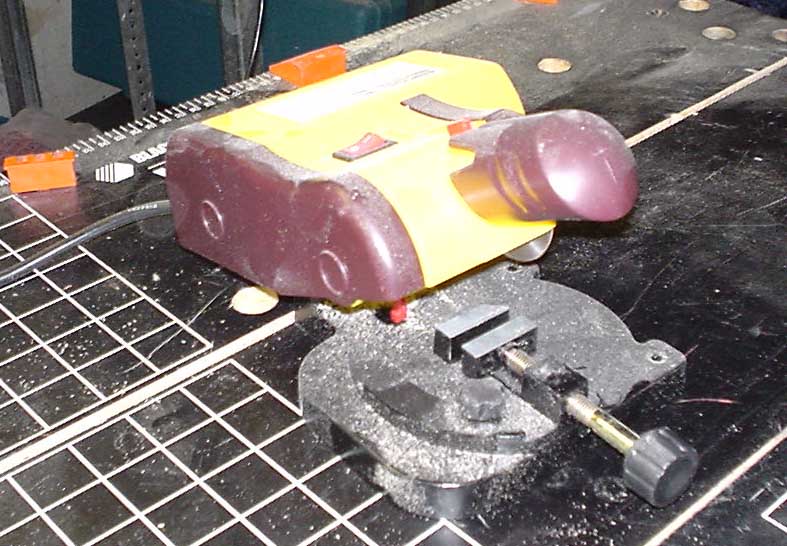 |
| This is a cable drive drill/grinder The speed control is a sewing machine foot pedal of sorts. It has the handiest bit mounted in it for this project, a small sanding drum. You can buy a whole bag of "Dremel style" attachments at your local home supply or builder supply superstore, Lowes, Home depot, Menards, or whatever regional variety you have nearby. | 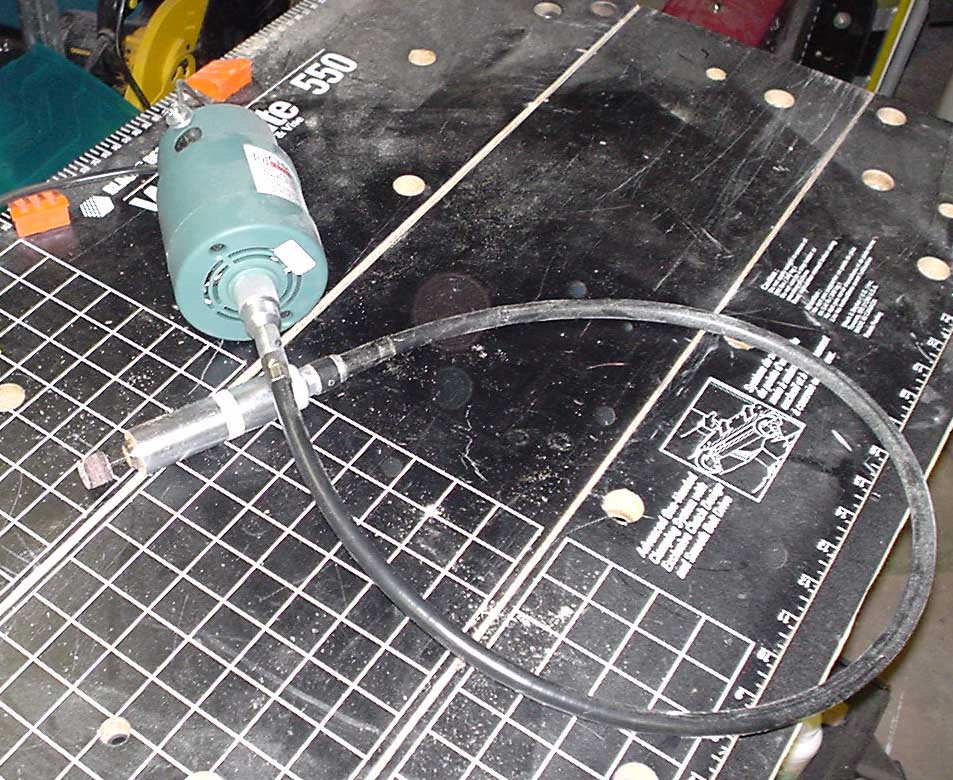 |
|
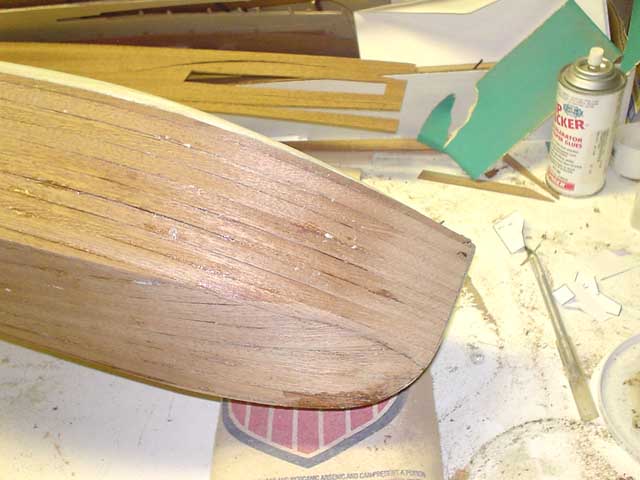
Feb 15th 2004 I have had to do some minor sanding of the bow in order to establish where the "V" is, so the top deck mahogany can be properly positioned. Not a lot of sanding, but just enough to trim the lumber to a decent appearance. This was all done with first a rasp, and then the small rigid hand sander. |
These small hobby tools came from Harbor Freight We have an outlet store here in town. I don't particularly like Buying all of this cheap Chinese import stuff, and contributing to the deterioration of our own American economy, but it was all I could find, and if you pay attention, you will find about 80% of anything you pick up in a retail store comes from China. Make sure you elect candidates that will enact legislation that revives the manufacturing sector of our economy ! |
| Not a great shot here, but You can see how the balsa rail has been further worked down to neatly join the top mahogany plank. All of this shaping was done with the end of the wood rasp, to get a flat surface for the deck to bond to. If I had followed the plans, there would have been a plastic caulk strip in the way of all of this shaping work |
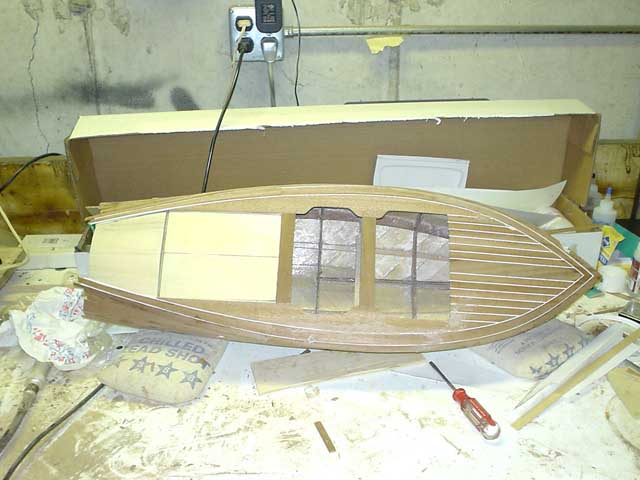
The Mahogany deck , is die cut from sheets, and requires a lot of detail shaping, and fitting. Particular attention was paid to getting the right bevel at the outer edge to neatly bond to the upper plank, so a large gap is not apparent at the seam. Where the pieces are end joined, a beveled lap joint has been used, as opposed to a butt joint Time to date 41 hours |
|
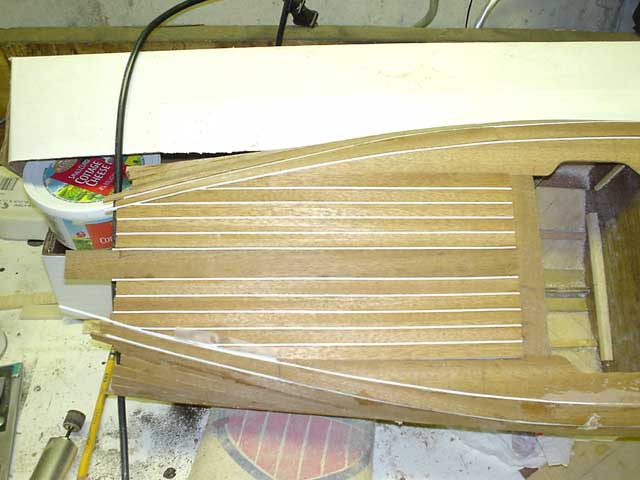
March 4 2004 Not many log entry's lately, been distracted by upgrading computers around the house for the last 2 weeks. I'm now working off of my new home built Abit IC7-MAX with 3.2Ghz H / T P4, dual 120Gb sata drives set in a Raid 0 configuration and 1Gb of dual channel 3200 matched ram. WoW! this was a long overdue upgrade from the old 900Mhz Duron. In the midst of all this I did spend some time working on the boat project though. as I had said earlier, the side panels on the gunwale took a great deal of custom fitting, and sanding to get a decent fit. It is key on all of this tight fitting mahogany to carefully undercut along the edges, making a semi knife fit toward the adjoining plank. This helps you "mash" the joint together while gluing. You may notice that at the side rails where I said I would do a angled lap fit, I have begun to pack in some wood dough, more on that later. The top decking tonight was a joy to do compared to all of the previous planking. It was straight forward, basically cut each piece to fit, alternating from one side to the other, and fitting the simulated styrene caulk in place. You can see my piece of "Gluing" saran wrap on the left, I have found this works well to lay down over the fresh glued part, you can see through it as to what is going on, and then hold it in place, It really saves the fingers! Some of my other attempts to save my finger tips were paper towels, as evidenced by the scrap on the left of the bow that is firmly glued in place. Not to worry, it sands off with no effort. |
In some of the time when I was not cutting and fitting, I was experimenting with different stains on the scrap mahogany to find a color that I like. The Kit comes with some dry powder water based stain, but I am afraid it will lack the soaking, and penetrating power of a solvent based stain, I have selected a solvent based wood dough that accepts the stain at an equal rate to the mahogany, and will match nicely. Before I start the final sanding, I plan to work this wood dough into every crack and crevice. This will hide any boo-boo's that may show up as the finish sanding process proceeds. Next to go is the die cut deck panels along the sides, the rear hatch, and motor, hood I hope this goes as well as this last bit did, I enjoyed working on this tonight. Time to Date around 45 hrs. |
|
March 8 2004 Spent around an hour and 1/2 tonight fitting the die cut deck sheets into place. This was tedious, the die cut's were not even anything that reassembled being close, at one point, I considered trying to get a sheet of mahogany from the hobby store and do my own. A lot of filing and sandingand test fitting, and they finally went in. The reminder of the time was spent on getting the hatch, and motor cock pit nice and lined up with the elevation of the new mahogany. The hatch seemed a little flimsy, and I decided to use some scraps to add to it and make it more rigid. Considering this little piece will be handled a lot, I may decide to add even more bracing yet. I cant get too far ahead of myself here, I still have the rudder, that was skipped over earlier, and after reading the review of this kit in the magazine, I need to spend a little time thinking about a stuffing box, with a zerk type fitting to accept grease, rather than the oil fitting they used. I will do some research on the Internet, to see how a traditional stuffing box was made, and the contents. Beeswax and rope ? |
Time to date 47 hours |
|
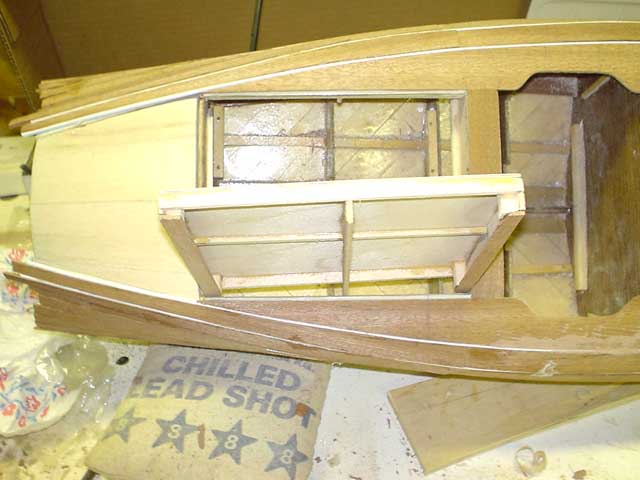
March 9th Making a push on this, I will have to take time away from this project and do taxes soon, another of my unfavorite things to worry about. I have decided to break with the plans on the rear hatch. If I had stayed with the plans by now the rudder block would be installed, and the rear hatch firmly cemented in place, making access to the rudder impossible other than with dental tools. The bell-crank for the rudder came in the kit incorrectly drilled, and tapped, and had to be reworked, otherwise it could not have been installed on the rudder shaft. Having worked on enough inaccessible parts designed in Detroit, I just couldn't make something of my own that could not be easily worked on. At this time I am debating if the rear hatch should be separated from the main hatch, and pinned in place, so it can occasionally be removed for maintenance, or to leave the two parts as one, as you see them, and just use the foil tape around the main hatch as a visual outline. Either way, I have time to move on with this while I think about it. |
At the angled seam of the rear hatch, I use a second strip of styrene to define the edge, making a double wide caulk joint at the rear angle. I don't think it looks bad, and should not distract from the appearance of the boat. Untill I make a decision on if, or how to split these two hatches, I can move forward with the rest of the boat, constructing the cockpit, and motor, servo accessories. Time to date 50 hours. |
|
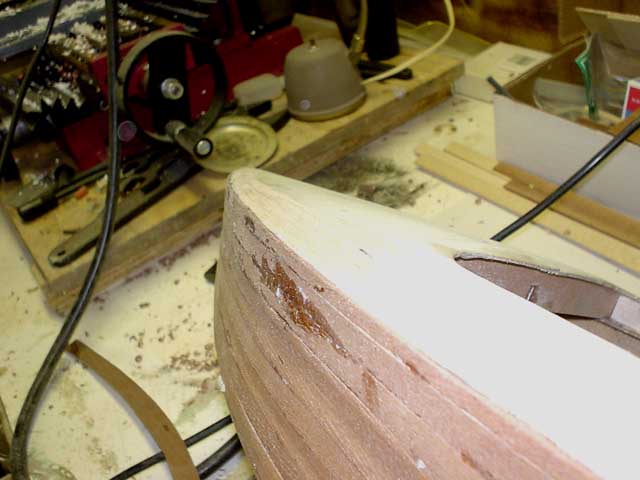
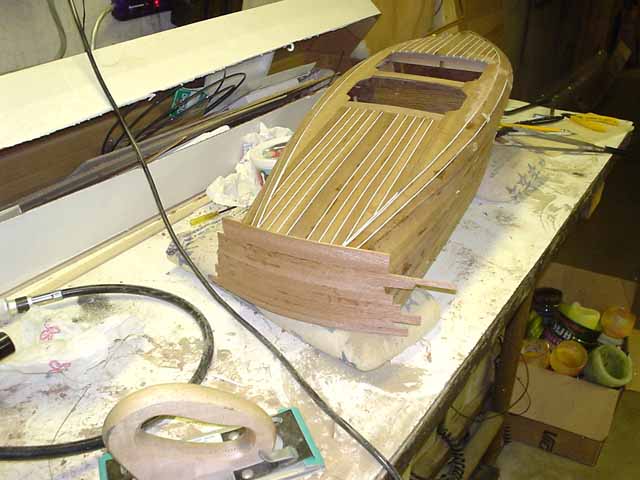
March 15th, 2004 Despite the working on taxes, I have spent a little time on the project. I have used the small block plane to trim all of the adjoining plank surfaces close, and some preliminary rough sanding to shape the hull. I have now finished planking the stern. Because I want to have the aft cover be removable, I now need a wider plank than what is supplied with the kit. A piece of scrap from the die cuts was selected, and milled down on the hobby table saw to make a 1" wide plank that was suitable to be used as the top most plank. All are now glued in place, and need to be trimmed with the drum sander to fit the outline of the hull. Time to date 52 hrs. |
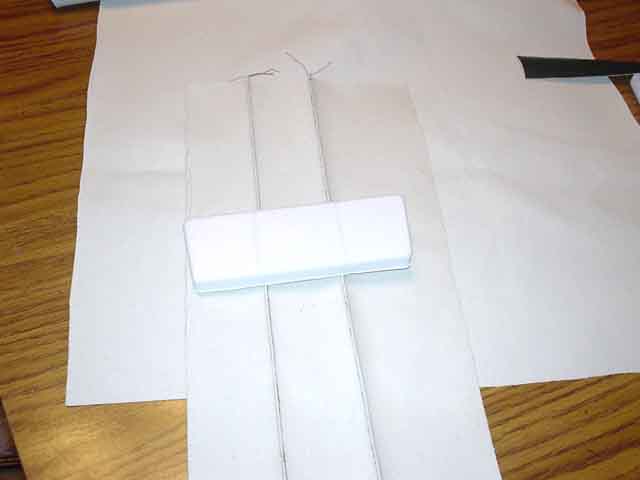
March 26, 2004 I have decided that as much effort as I have put into this boat, the cheap Charlie polystyrene seats just wont do. I have gone to t local fabric store, and bought 1/2yd of green naugahide. I selected this particular material because of it's suppleness, hoping it will be easier to work the small radiuses involved with these tiny seats. You can see from the photo's that I have sewn in the tucks that are in the seat upholstery. I have taken a few quick sewing lessons from my mother, and now need to practice, putting the skirts onto the patterns when cut out |
|
You can see from this photo how the styrene seat is lined up with the pleats, and will be traced around to make the seat top. Although not very interesting, and not photo documented, I have been spending several house with the hand sander finish sanding the boat also. It's dusty, and literally a lot of elbow grease, so after an hour or so, I leave it sit, and come back a day or two later to begin again.
|
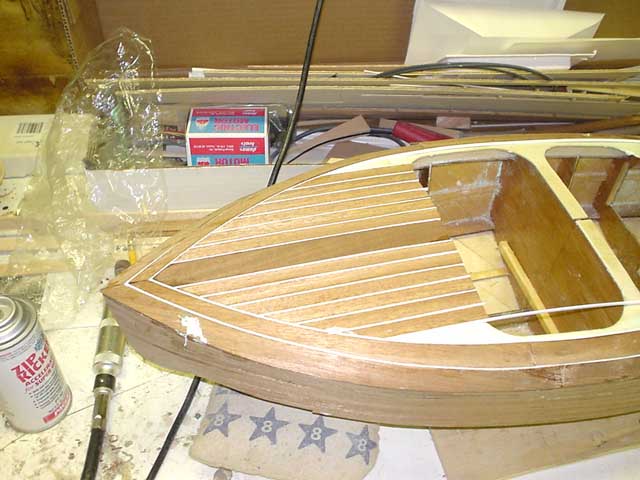
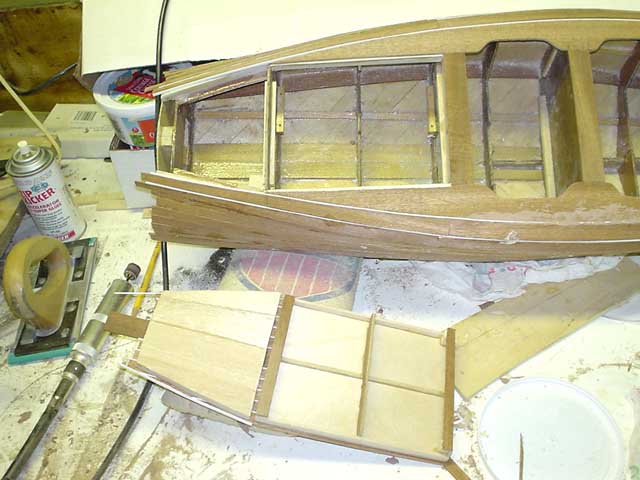
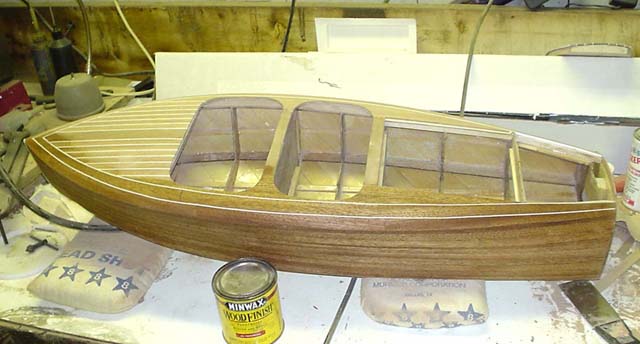
April 22 2004 Taxes done, and a few days to catch up on everything else that has suffered for the last month! Back on the kit now! These are the interior plywood parts that have been cut to fit, and sanded with 320 grit paper. They have been stained and sealed with a Minwax product called polyshades, a mixture of polyurethane, and stain in one. It does a good job of matching the other Mahogany wood. It has a satin finish that will be a nice contrast for the interior against the glass like gloss I plan for the hull. You can see the cockpit on the right has been partially assembled. For the non skid surface that would be in the real boat, I will coat the floor components with the rocker panel texture that you can use on you vehicles. I would not recommend going out and buying a can just for this, It's quite expensive, around $25 a can. I have some left over from when I chip guarded one of my vehicles last year. once the texture has been applied, this will be painted a light flat grey. |
|
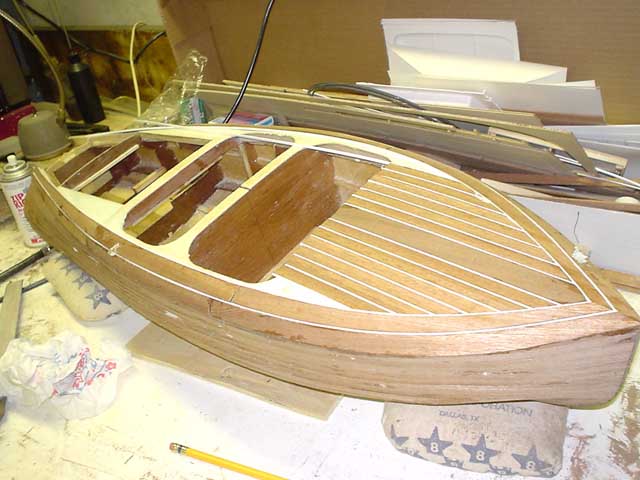
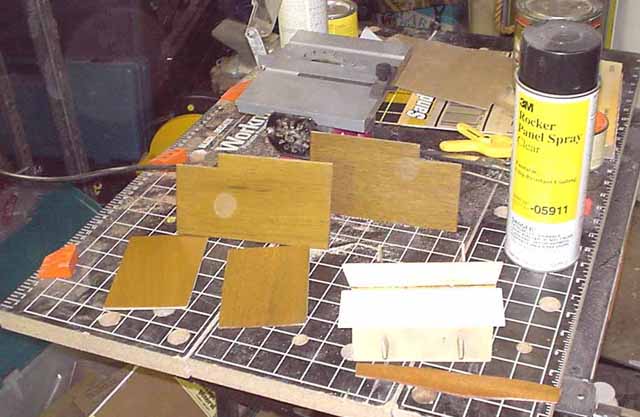
Well, after several hours of sanding I could not wait to test the stain. I am using another minwax product, color name "Provincial" looks good, not too deep or dark All sanding was done with the small rigid hand board, with 100gr paper, once the major lines of the boat were defined, and the rough was knocked off, I switched to a rubber block, and progressed to 220gr, and finally 320gr. I used a lot of sandpaper, when sanding materials with differing hardness, like the super glue Vs the mahogany wood, you have to keep the paper sharp, so it "cuts" rather than "rubbing" the stock off. This will keep everything straight even, and avoid the lumpiness once the finish has been put on. "It's too late then" to correct it, so take your time. The kit came with another set of paper templates to help shape the curvature from deck to gunwhale, but I did not use them. With the hand block, and long stem to stern "rolling" sanding strokes, the shape will come naturally. It will also be very uniform from one side to the other, It just develops as you sand. You can see that the mahogany on the deck around the cockpit openings has been trimmed back to the correct opening shape. This was hogged out with the small drum sander. I still have not attempted any further sewing of the seat upholstery, saving that for later, I think I'm on the downhill stretch with this project now. Next to do is install the rudder, a step that I opted to skip several weeks ago. Now the hull has been sanded, time to put it in. After that the mechanical parts like the driveline, and motor Time to date 55 hours |
|
 |
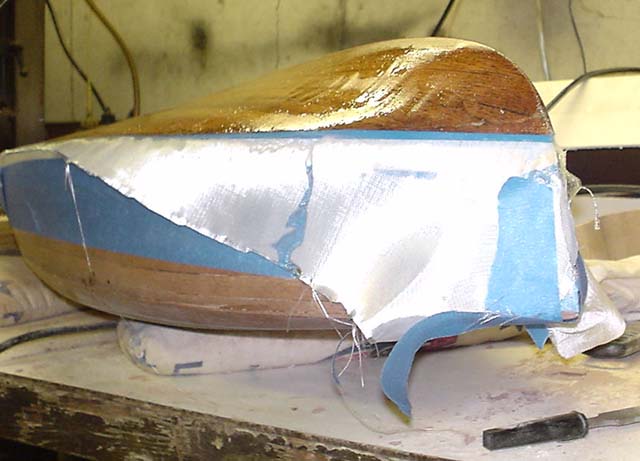
May 6th 2004 Started the fiber glass application on the hull. This is actually the second layer, the first was last week, when I applied a layer of 3/4 oz. weave. That was sanded, and the final layer of 2 oz. glass is on now. Each time I used a plastic pin stripe masking tape to define the edge between the hull and the gunwale. A strip of normal 2" wide mask is then applied over the striping tape. This keeps the resin off the rest of the boat, and makes a nice line to which the glass can be trimmed. This photo was shot just after the finishing resin was put down. In 2 hours I will go back, and with a razor blade slice the glass as close to the mask. The resin cures hard in 4 hours, and is a plastic putty stage in 2 hours. Easier done with a blade than with the sander. |
|
My best advice with this stuff, is not to play with it too much after it has been put down, and is flat and even. The more brushing you do, the more it will tend to bunch up, and make ripples. some gentle pulling at the edges can be done once the mat has been wetted to get a good flat lay. At the bow, I used some extra tape to help pull the mat down along the profile of the bow. Once this is hard, another layer of resin will be put down and worked to help make a smooth surface. The resin on the hardend glass can be brushed around as much as you like, it will no longer affect the hard glass (no ripples)
Time to date around 58 hours. |
 |
|
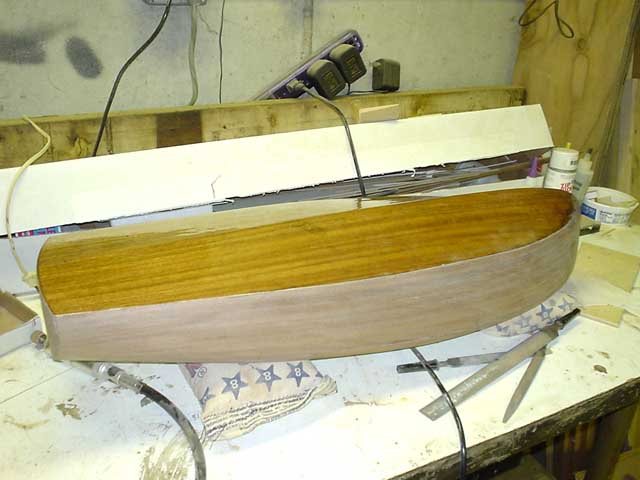
August 27 2004 Man!! I can't believe that summer is about over. My best laid plans to have this boat done so I could try it out this summer went awry the second week of May. I have not touched this, or much less even thought about it until now. You can see that the fiberglass has been trimmed back, and tooled down even with the hull. My next step is to finish sand and paint the hull red. With summer behind me now, I am going to discipline myself to a 1/2 hour or so each day to work on this boat and finish it up. I will start this regiment in September. Time to date 59 hours |
|
| Back to USA |